Background
Well, Unmasking went pretty well. I chatted for awhile with Falx, my second round opponent, and learned a lot about the meta up in Bozeman. Seem like good people all around up there, and I had no idea that a meta existed in Montana whatsoever. Some part of me figured that the big Infinity Discord server attracted more general interest than perhaps it does. I did suggest Mercenaries to them, since different play styles in such a small meta can keep things feeling fresh.
Prizes were handed out from prize support between the second and third round, and seemed to be done in a randomized fashion. Which is about as fair as it gets. It would be very difficult to do it any other way with around 120 people playing. I stepped outside afterwards to get some fresh air away from the sweatbox of the hotel's convention center. Not in some metaphorical sense, although some of the games were surely also sweaty, but in a literal sense. The hotel's climate control system was clearly having something of a difficult time keeping up with that many bodies in one place.
Prelude
Currently at 1-1 and with 6TP, I felt pretty decent about my chances going into the next match. I ended up being assigned to play on an incredible Sonic the Hedgehog themed board made of 3D printed parts, terrain from Wildlands, and a lot of love and care. I can't recommend Wildlands Terrain enough. Shipped from Ukraine, the ordering process basically consists of getting invoiced and wiring money to Ukraine, which feels a little bit shady.
Until a 5kg box of MDF arrives and you realize that you got an entire table's worth of terrain for USD250, with shipping included. It's just a tremendous amount of value for the money, and supporting anyone in Ukraine right now feels nice as well.
My opponent was a friendly player with an ITS name of Swamp_Druid from the Baton Rouge meta, which is evidently pretty big, and was playing Kestrel. I wasn't sure whether to run my Jotum list or my Karhu list here, since Kestrel struggles a bit at cracking serious armor, until drawing classifieds and seeing that they'd be far easier to accomplish with my infantry-based list.
Classifieds

Out of the classified options, these were the ones that looked most feasible. And all of them could be done pretty trivially by the Karhu duo that often got a significant portion of my orders. Not only trivially, but basically all in the same spot on the board. I'd just have to clear the way to the spot.
This sealed the deal for me. My Jotum list has precisely one visor and, besides, TAGs are pretty common in Kestrel. And I'd been hearing stories all day about Bakunin players and others running double TAG lists. If there was a chance that Swamp_Druid (my opponent) was running TAGs, I wanted a hacker and some serious firepower on the board. So the Karhu list it would be.
The Lists
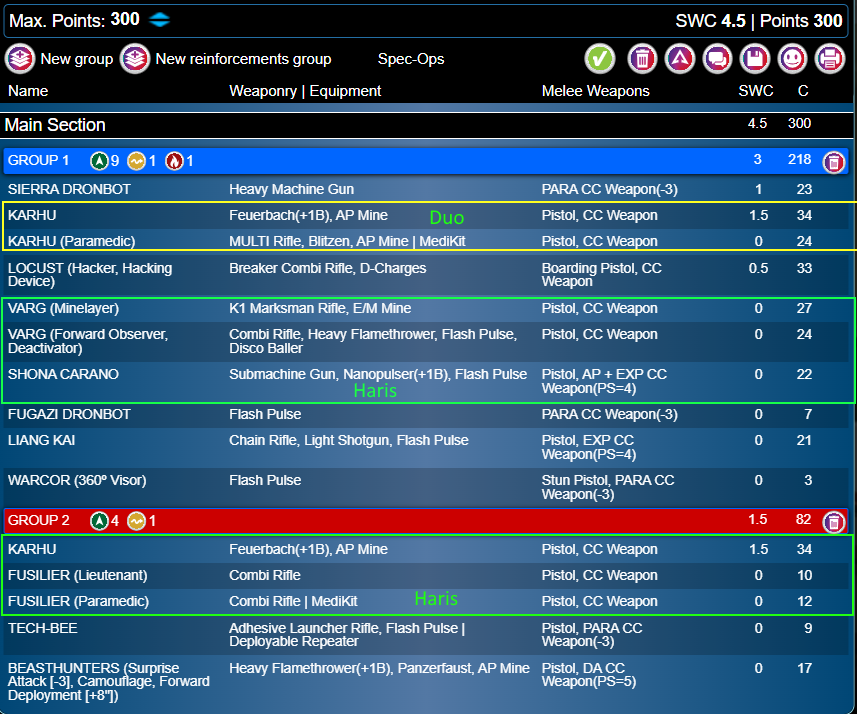 I'd be running my triple Karhu list into this mission. The board looked favorable for it, with some good long sight lines and vertical terrain. And there's no exclusion zone on Unmasking, so I had a thought that perhaps the Locust or Beasthunter could make a run of it this game.
Ultimately, though, I knew that my hopes for doing my classifieds all depended on the Karhu duo. Clearing their way to the enemy HVT had to be a priority, because they can move very efficiently and anything else was likely to be a chore and make the mission much more difficult than it needed to be.
Opponent List
 Well, he was indeed running a double TAG list. With a Black AIR and a couple of infiltrating Jackal minelayers. I must admit that I didn't expect or plan on that, since they're not a common pick in my experience. That was a bit of a wrinkle in the idea of the Locust or Beasthunter moving through the midfield unimpeded, since the board funneled all movement through a couple of defined lanes to cross the midboard.
I like the list, though. I'd another example of the incredible flexibility of Kestrel that it can run a double TAG list with a powerful hard ARO piece and a couple of minelayers, while still pushing 19 orders when counting the tacaware and lieutenant orders from the two TAGs. Some serious work would be required to thin this list down before I just got run over.
Deployment
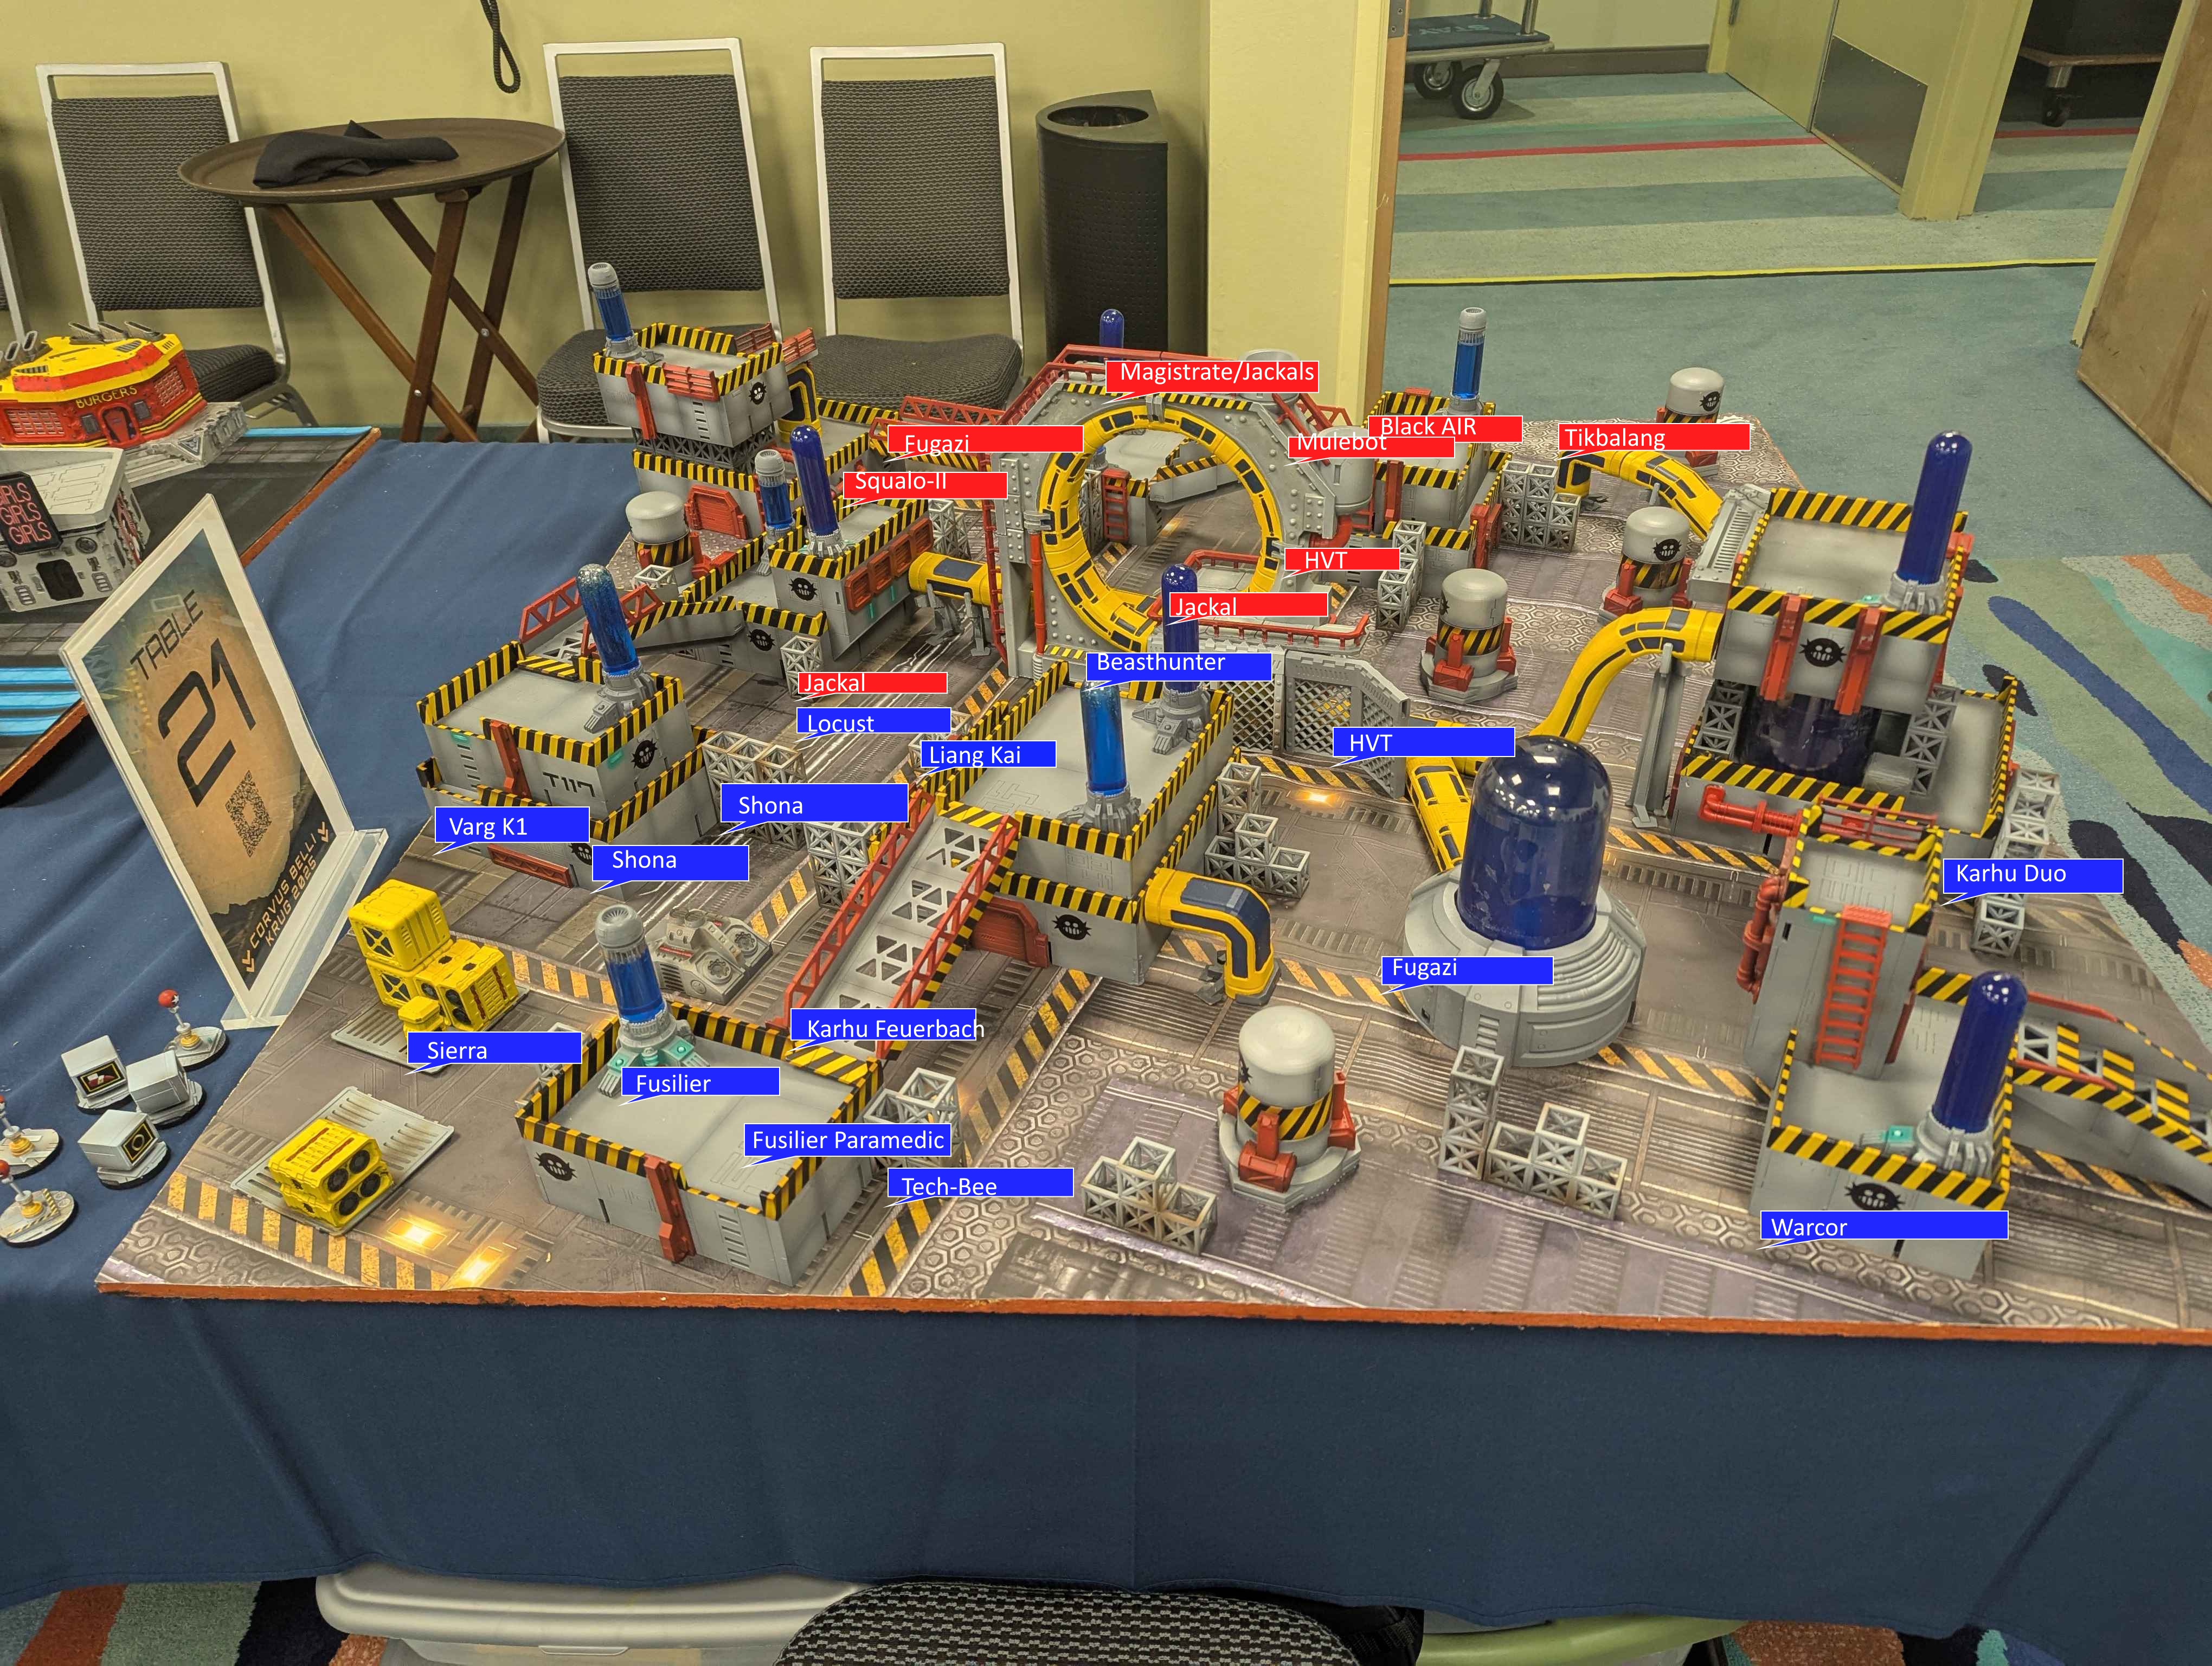
I thankfully won the LT roll and decided to go first, since there's no real advantage to going second on Firefight. I set up my Karhu duo far on the flank right next to a building with good lines of fire if they were to climb, barely supported by a couple of flash pulses from my Fugazi and Warcor, then deployed the Group Two Karhu haris on a rooftop with a line of fire straight through the loop crossing the center of the board to a likely Black AIR spot.
The Vargar and Shona went to a denser part of the board on the opposite flank from the Karhus, with the Beasthunter and my HVT central to the board. The HVT so I could defend it, and the Beasthunter so that I could swing either way as needed. The Locust was placed right next to a panoply on the same side as the Vargar, and Liang Kai was held in reserve.
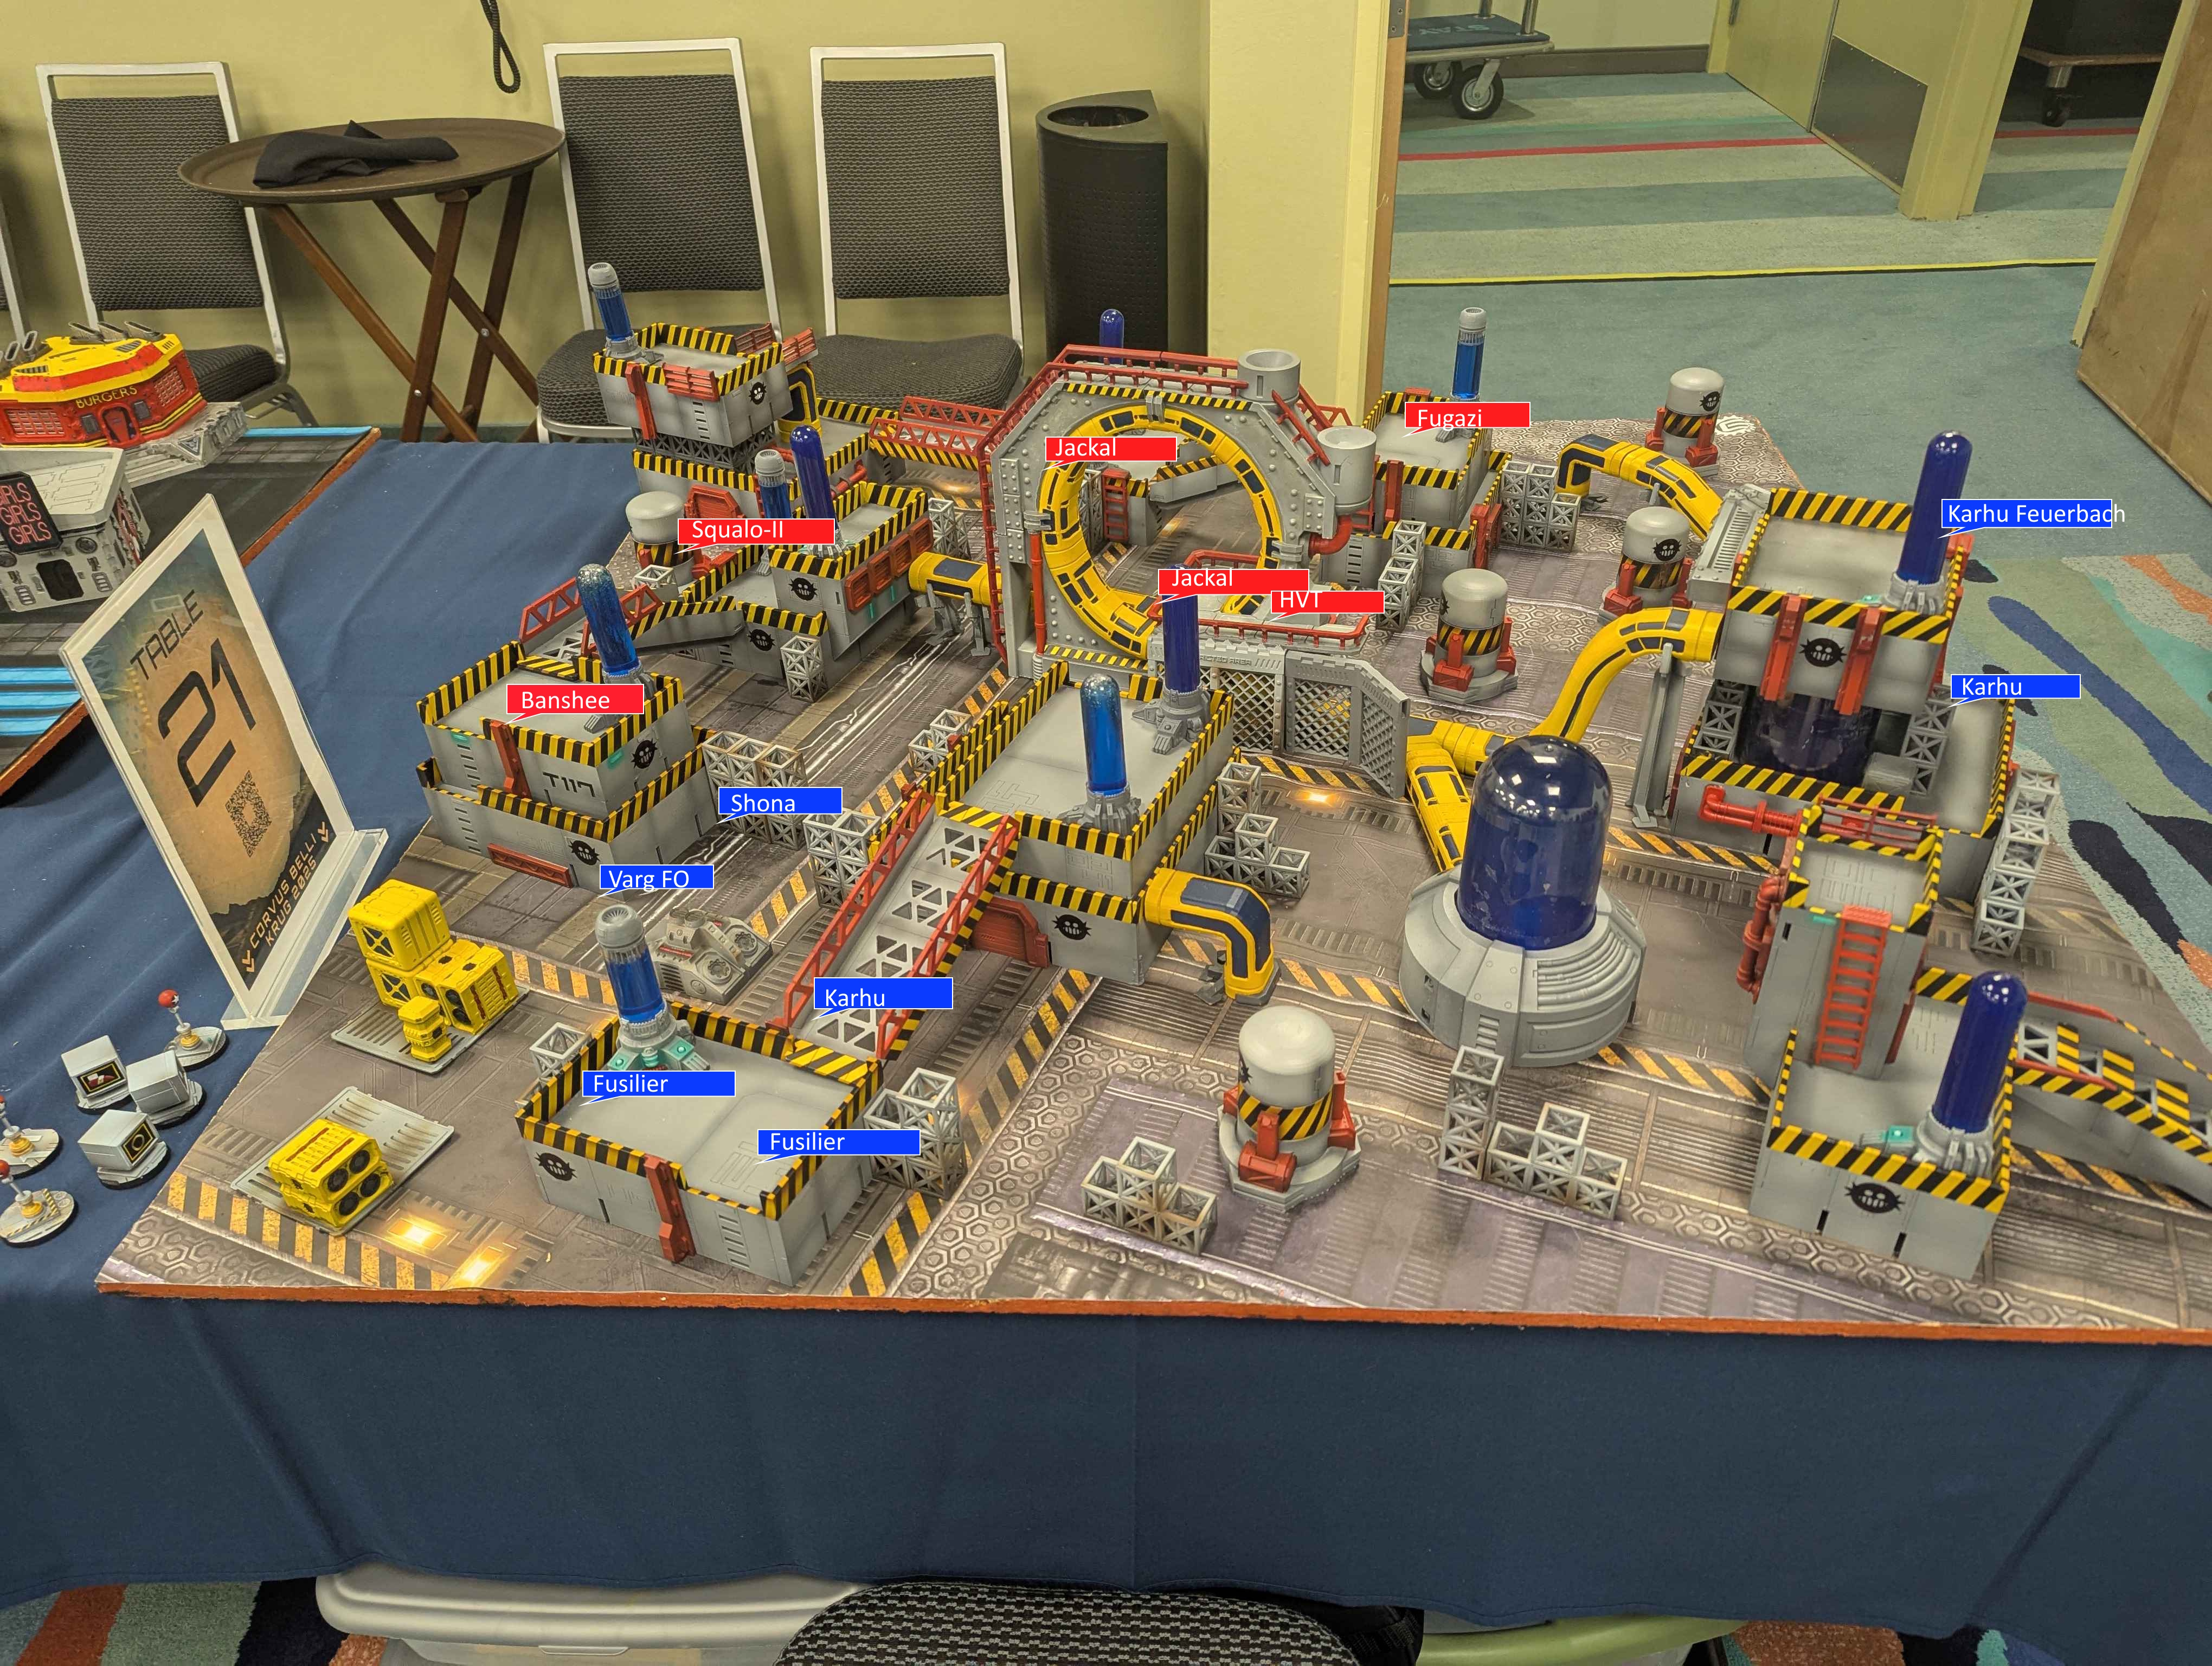
Swamp_Druid deployed his Black AIR on the expected high ground, supported by Jackals on the ground about a foot to the right. The Squalo-II went down on the opposite side, and the infiltrating Jackals came down to surprise me, covering the area behind the loop near his HVT with a mine and boxing the Locust in behind the panoply.
Well, I didn't expect minelayers. I deployed Liang Kai near the Locust and figured I'd have to sacrifice him to clear the way before the Locust got put in a terrible position. Swamp_Druid dropped the Tikbalang on the far side, near the Black AIR.
Apologies, the other deployed models on his side are hard to see from this angle and are unmarked.
Turn One (Svalarheima)
Looking at the board, I wasn't sure whether or not to spend my impetuous order on Liang Kai. On the one hand, he'd probably eat a phenomenal number of AROs. On the other hand, he could certainly dispatch the Jackal there and clear the mine by the panoply, and that would free up the Locust to harass the Squalo-II.
It wasn't a great trade in theory, but I took it anyway. I needed the mines gone, and the Jackal positioned there would be a thorn in my side until removed. Liang Kai did indeed die, taking a massive amount of damage from other AROs. But the way was clear.
That done, I moved my Beasthunter through the gap now opened. My goals here were to clear the other mine and, hopefully, kill the Black AIR. The Beasthunter got discovered by a Jackal one jump short of flamethrower range of the Black AIR, so I spent an order to jump into the mine's trigger area and flamethrower the Black AIR, which dodged. The Beasthunter died from the mine, but now the path to the HVT was cleared for my Karhus. And more.
Initial clearing done, the Karhu duo climbed the nearby building and, next order, the feuerbach was able to peek out and see the Tikbalang. The Tikbalang couldn't Guts anywhere, and was off the board in three orders. I saw an angle where I could see the Squalo-II cross-board from where the Karhu duo was, but I couldn't take that shot without taking out the Black AIR first.
So I activated the Karhu from Group Two and took the fight. It's not a great fight, but the Karhu is favored and won after we bounced off each other for an order. The Black AIR was down, and firepower superiority was tilting in my favor already.
With the way clear, I poked out and got in one order of shooting at the Squalo-II, inflicting 2W in the exchange. The Squalo Gutsed to total cover, and the Karhus withdrew a bit to safety, dropping a mine along the way. I moved the Locust up to the other side of the building that the Squalo was on (more than 8" away, since it was a large building) and spent my last couple of orders in Group Two shooting down the Jackal that was standing and had discovered my Beasthunter.
Turn One (Kestrel)
Down about half his points and needing to score, Swamp_Druid did the smart thing and dropped in a Banshee KHD near my Vargar, in total cover behind the building. I dodged out to cover him with the K1, hoping to delay him. The Squalo peeked out and shot me down for my trouble. The Banshee quickly accomplished Mapping and Vigilance, then moved, discovered, and Trinitied my Locust. Maximal efficiency and a good play. The Banshee is just an incredible profile.
The Squalo didn't have enough orders to press the advantage on that flank, so he moved around his remaining Jackal to harass anything I had moving through the midfield and guard his HVT and settled in to make it costly for me to score. I was up on LT kills and army points but hadn't killed a specialist yet, and he'd killed the Locust and had two classifieds done, so we were currently 4-4.
Smartly played on my opponent's part. He didn't have many specialists on the board (Magistrate, Fennec, now Tech-Bee). If I lost the Varg FO clearing the way, which was very possible, it was going to be hard to score those 2OP even if I won. This might be closer than expected.
Turn Two (Svalarheima)
 Well, the path was clear. To take the lead back, specialists had to go. The Banshee was right at hand, but that might end up being a trade of the Varg FO for the Banshee itself, with the Squalo watching the way. But after that was done the board would be pretty clear.
So I swung the Varg FO and Shona around the order, staying far enough to my right that the Banshee and Squalo couldn't see. The fight would have to happen out of cover and the Banshee had a Pulzar (again, what an incredible profile), so we traded templates. The Varg FO used its heavy flamethrower and got hit by a Pulzar instead. Doing it with Shona's nanopulser probably would've been better, but I forgot it had a Pulzar and was expecting the Varg's Albedo to put in work against the SMG so I could shoot it with a combi.
That done, Shona spent a couple of orders and moved up to reach CC with the Squalo, which promptly exploded. That removed his last long-range gun, and I thus owned the board. I didn't really have enough orders to do my classifieds with the Karhu yet, and it hadn't fully sank in just how few specialists he had on board, so I shot the overwatching Jackal with my Karhu from Group Two and moved the Karhu duo to a central position to launch off next turn.
Turn Two (Kestrel)
With all of his long range weaponry dead and the board being watched by my Karhu near my deployment zone, there weren't a lot of moves he could make. The board was pretty open and I had great lines of fire.
There was probably a play to make going after the Karhu duo with his Jackal in the center or with the remnants of the Fennecs that had been in the Black Air link attempting to kill the paramedic. Which may have been low odds, but would give him a strong 3-1 on specialist kills. There wouldn't be many orders to make the attempt, if it could be reached at all. But if there were a play to be made, that would've been it. It's a bit more visible from another board angle.
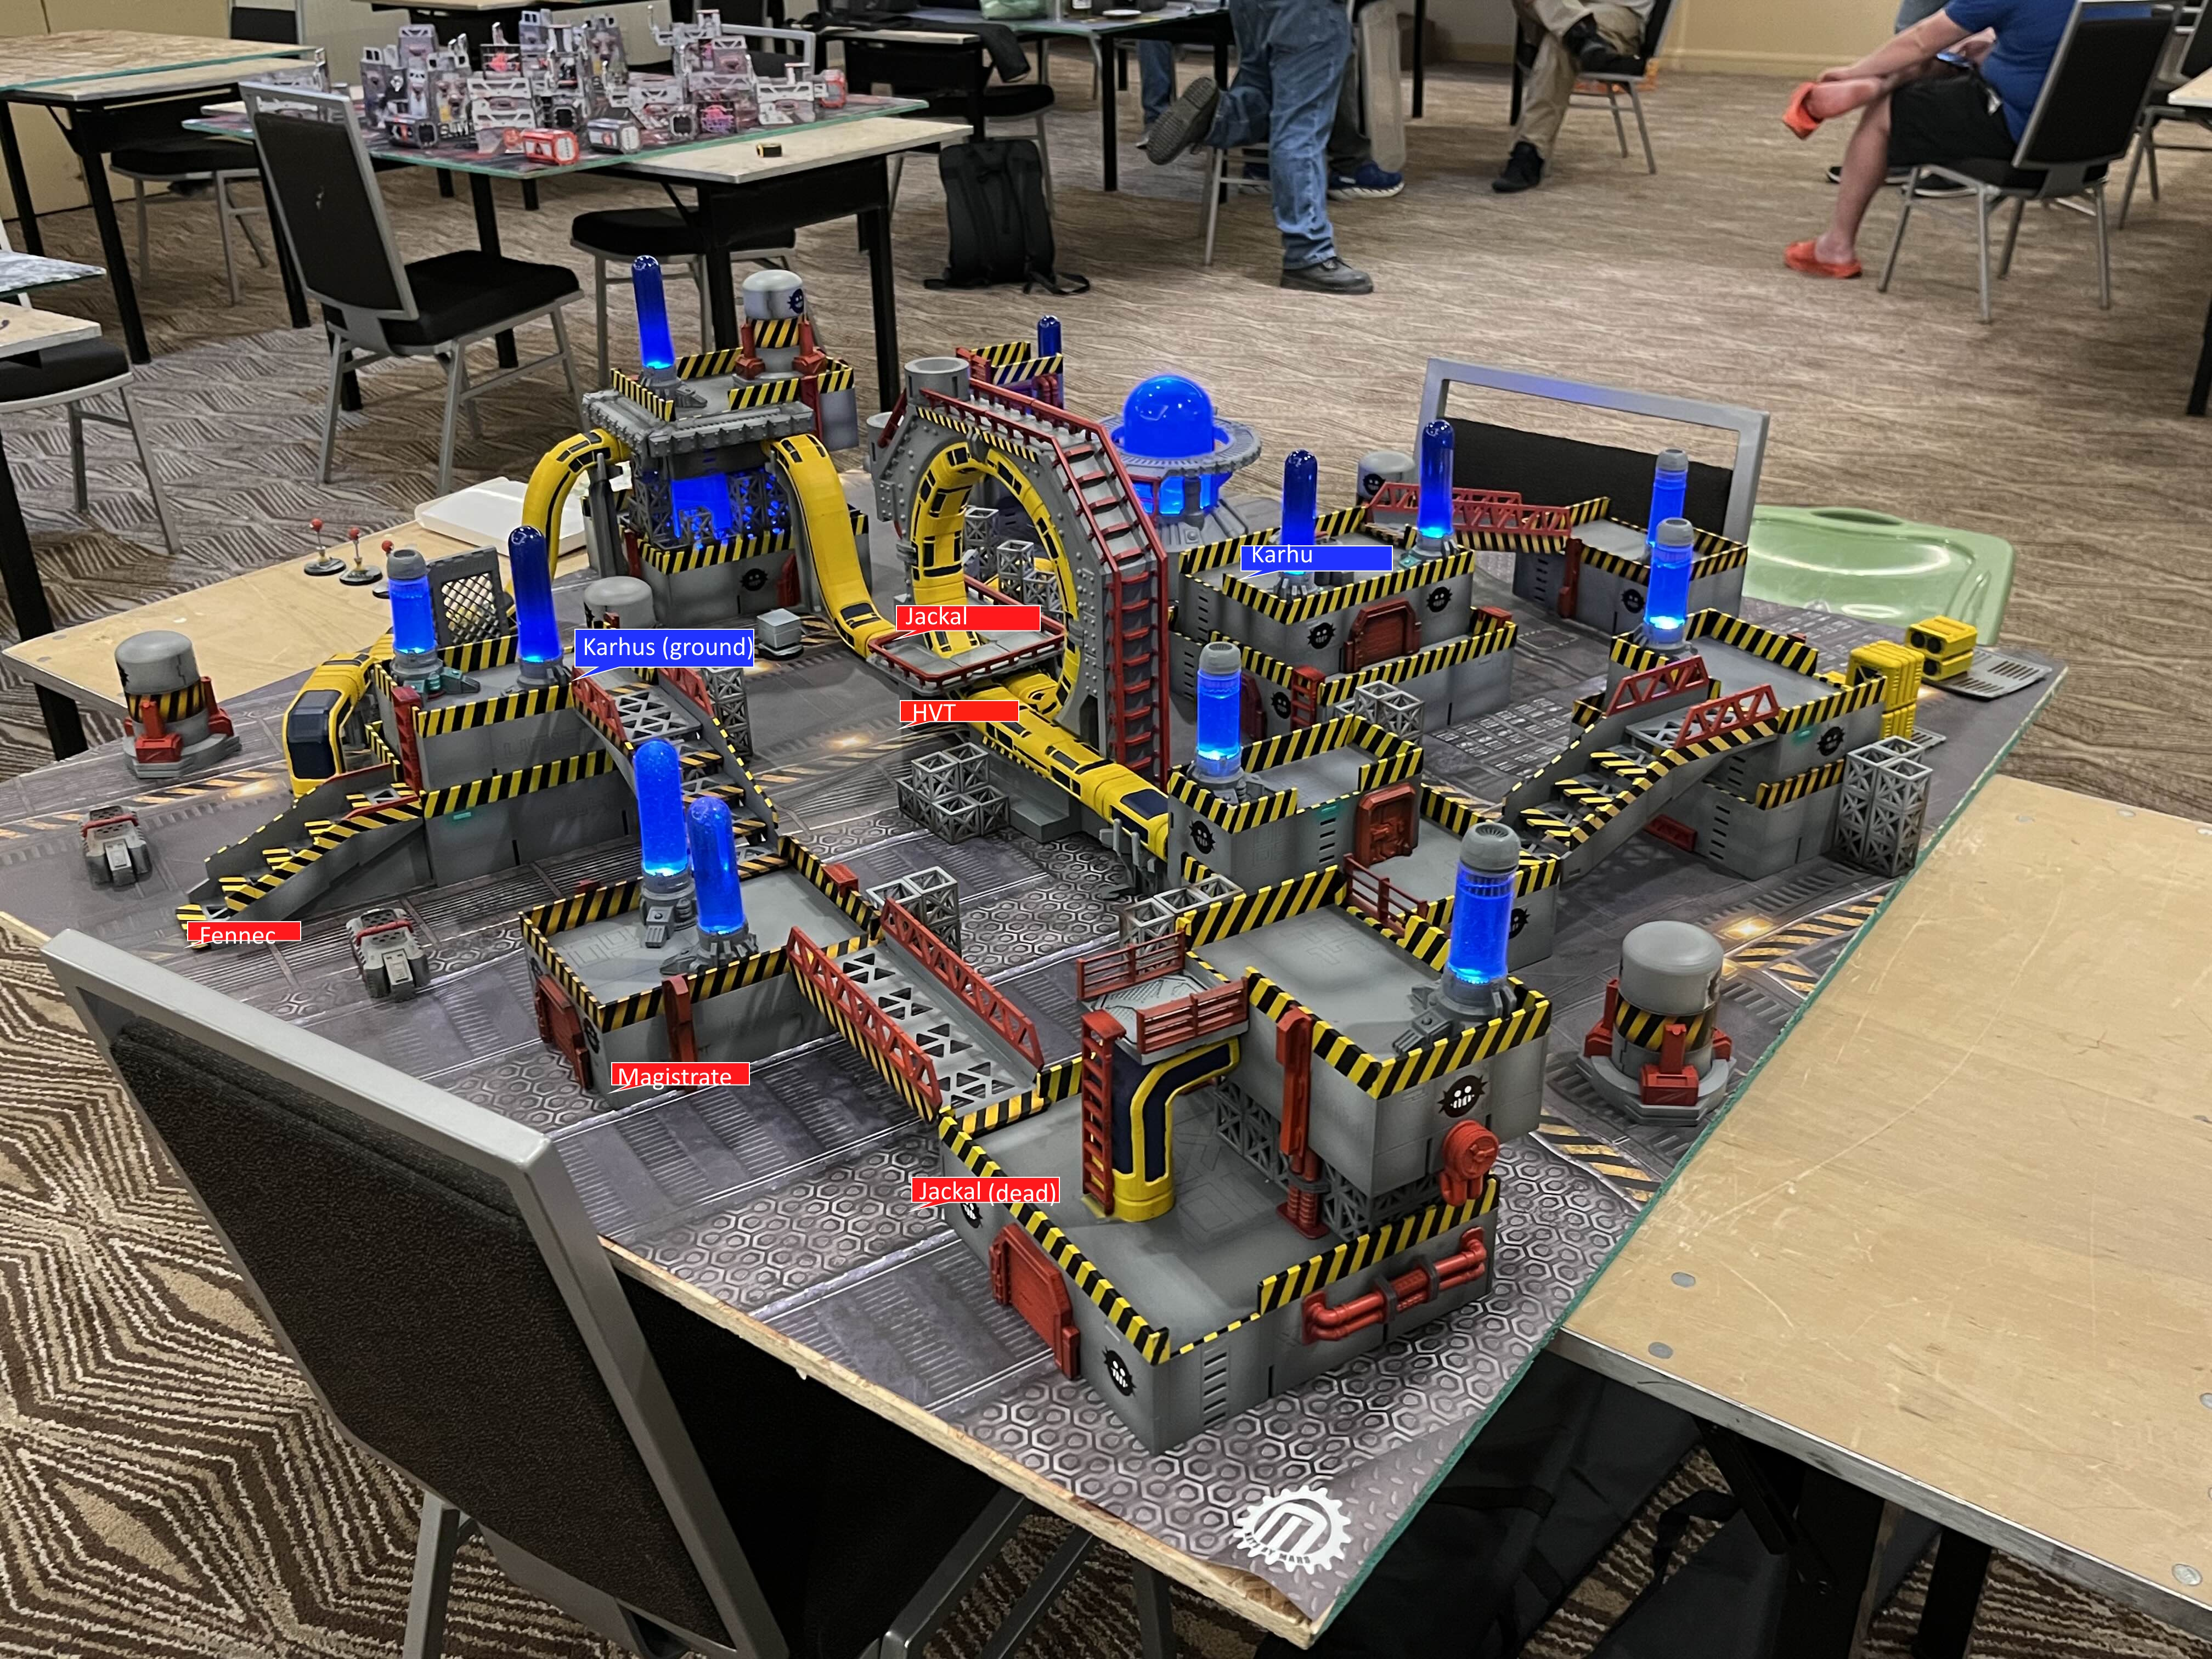
In the event, that play wasn't made. He reorganized a bit and passed turn.
Turn Three (Svalarheima)
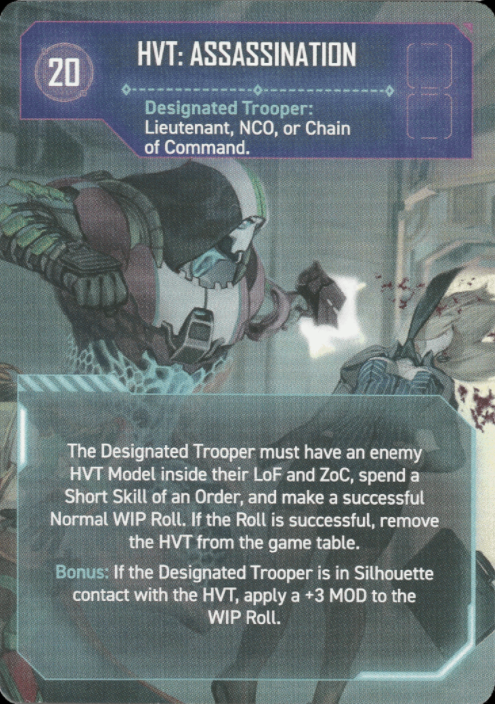
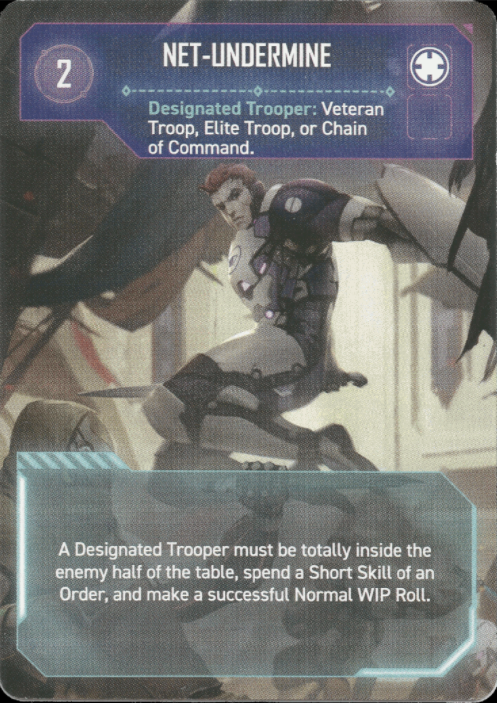
This entire turn came down to the Karhu duo. Realizing that I'd have to nearly table him in order to win on specialist kills since I was currently down 2-1, I moved the paramedic towards the HVT and the feuerbach to the back line, completing Net-Undermine along the way. One more order got me HVT: Identity Check and the duo broke. I spent a further order to complete HVT: Assassination, then used the Karhu to shoot down the Fennec paramedic and Magistrate with the feuerbach.
Turn Three (Kestrel)
In loss of lieutenant and retreat, he grabbed an item from the panoply with his Jackal, resulting in a...
9-3 Svalareima Victory
Postmortem
Well, that game felt better than my previous game against Kestrel. I made far less stupid, sloppy mistakes. And I'd attribute that in part to being a lot more familiar with my list. I don't run the Jotum list much, and so there's a certain amount of excitement in using the big bully TAG that leads to my getting a bit overextended and not thinking beyond the gun.
There were still mistakes made for sure, though, and they mostly come down to the Vargar. The K1 Marksman Rifle profile is also an E/M minelayer, and I placed an E/M mine guarding the corridor near the panoply, which left the side of the board wide open for the Banshee play. I need to get better about watching and planning for that.
Similarly, asking about profiles and equipment before deciding on my next order. Shona could've dumped two Nanopulsers on the Banshee and gone into NWI with no real loss to my plans, except that specialist kills would've been 1-1 rather than my remaining down 2-1 and needing to basically table him in order to win 9-3 instead of 7-5.
Not that margin of victory is particularly important, and part of me feels bad thinking that way, but getting my classifieds done was no guarantee and trading the Varg that way left potential OP on the table. It was sloppy, and something to learn from.
Similarly, I didn't realize the Banshee was the KHD at first and it didn't cross my mind in the moment the Locust had a boarding pistol. The Locust shot back with its breaker combi in response to Trinity, but accepting the Locust's death and hoping to remove the Banshee with a DTW would've meant that I didn't have to negotiate the Banshee with the Varg at all and specialist kills would potentially be 1-1, depending on whether the Banshee made its armor save or not.
Overall, the game went well. And it really came down to the first turn. Removing the Tikbalang and Black AIR were, in that order, the goals I had going into the turn. Killing the Tikbalang would give 2OP for being up on lieutenant kills as well as removing a potent LT+1 profile that can really punish opponents, and the Black AIR had excellent sight lines to lock down the board. Once those were gone and I felt like I had won the firepower fight, the rest of the game was a lot more comfortable.
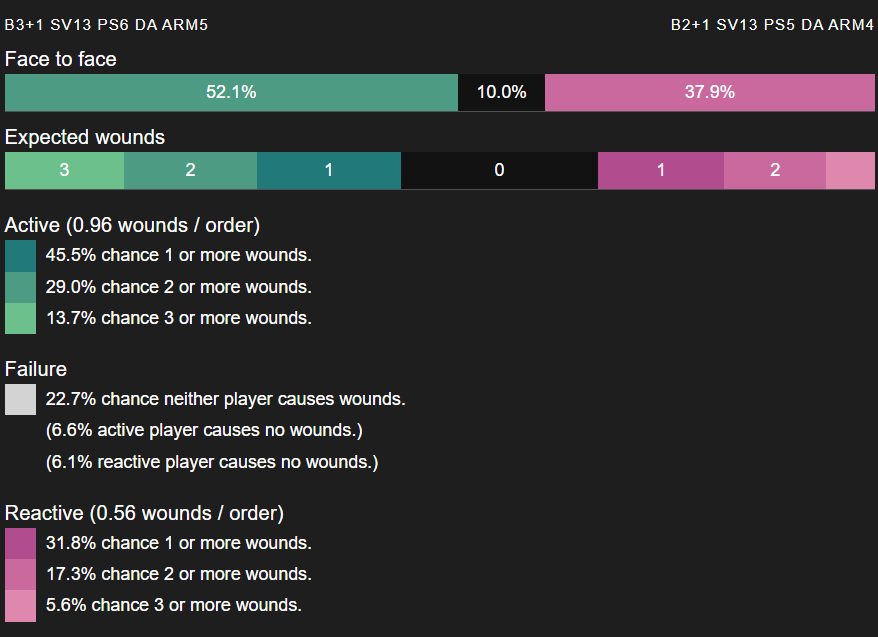
My opponent made the comment at the end of the game that, at no point, did he roll less than four armor saves while the Karhus were shooting except in one case where he rolled three because I crit with one shot and I missed the rest. And pretty well sums up the game.